Tin Foil Rocket Ship
Theme Unit: Outer Space
Rationale: For this art project, students get the opportunity to work with different textured materials, using their fine motor skills, and using shapes to construct an object. This project has the freedom to pick and choose what you focus on (spelling, numbers, symbols, etc.)
Textures
-Tin foil
-Construction paper
-Pipe cleaners (optional)
-Pom pom balls (optional)
Fine motor skills worked on:
-Using a scissors to cut out circles, triangles, squares, rectangles, diamonds, ovals, etc.
-Gluing different materials together
Materials:
· tin foil
· multiple colors of construction paper
· glue sticks or tape
· scissors
· pipe cleaners (optional)
· pompom balls (optional)
· be creative – anything will work for this project!
Motivation: “Kindergarteners, we just finished learning about astronauts and their voyage to the moon. Can you remind me who those special astronauts were? (Neil Armstrong and Buzz Aldrin) Thank you for reminding me. Today, we are going to create our own spaceships using shiny tin foil and shapes. After we’re finished, we’ll hang them up on our launching pad that I created.”
Steps: Before you start the project, complete steps 1-2.
1. Teacher prep – Cut out a rectangle of tin foil for each student. You can make them as large or small as you want. Just make sure the students are able to fold them so the rocket is thicker than a single sheet of foil.
2. Teacher prep – Cut out squares of different colored construction paper. Place multiple squares at each table or center. Have scissors, glue/tape and additional materials ready also.
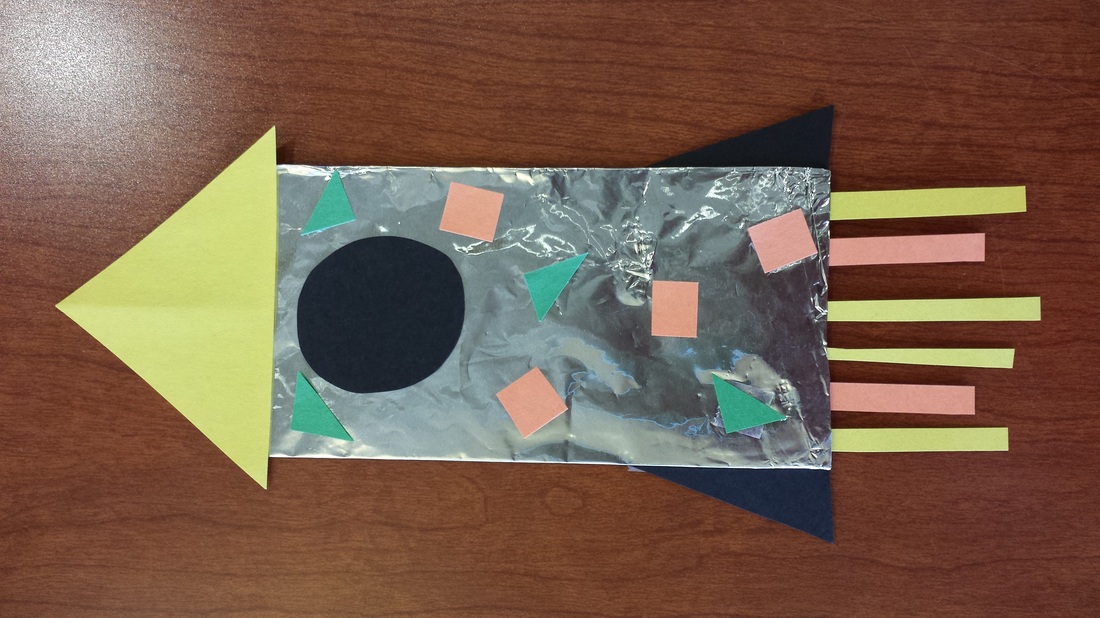
3. Instruct students to fold the tinfoil into a rectangle.
4. Students can then cut out multiple shapes and glue them onto the rocket.
5. Once their shapes are glued on, they must cut out the tip of the rocket (triangle) and a base or flames (rectangles).
6. Once the project is complete, have the students write their name on the backside of the rocket.
7. Optional – Take a picture of each student’s face, cut them out and glue them to the ‘window’ on the rocket ship so it appears that the student is the astronaut in their own space ship. This makes the rocket ship more personal to each individual student.
8. Display the rockets in the classroom on a bulletin board or on a ‘landing pad’ previously created. Make sure the rockets are completely dried before hanging up.
Bibliographic Data: This project was self-created but it was inspired by multiple rocket ship crafts from Pinterest.
"Pinterest." Pinterest. N.p., n.d. Web. 17 Nov. 2014.
Theme Unit: Outer Space
Rationale: For this art project, students get the opportunity to work with different textured materials, using their fine motor skills, and using shapes to construct an object. This project has the freedom to pick and choose what you focus on (spelling, numbers, symbols, etc.)
Textures
-Tin foil
-Construction paper
-Pipe cleaners (optional)
-Pom pom balls (optional)
Fine motor skills worked on:
-Using a scissors to cut out circles, triangles, squares, rectangles, diamonds, ovals, etc.
-Gluing different materials together
Materials:
· tin foil
· multiple colors of construction paper
· glue sticks or tape
· scissors
· pipe cleaners (optional)
· pompom balls (optional)
· be creative – anything will work for this project!
Motivation: “Kindergarteners, we just finished learning about astronauts and their voyage to the moon. Can you remind me who those special astronauts were? (Neil Armstrong and Buzz Aldrin) Thank you for reminding me. Today, we are going to create our own spaceships using shiny tin foil and shapes. After we’re finished, we’ll hang them up on our launching pad that I created.”
Steps: Before you start the project, complete steps 1-2.
1. Teacher prep – Cut out a rectangle of tin foil for each student. You can make them as large or small as you want. Just make sure the students are able to fold them so the rocket is thicker than a single sheet of foil.
2. Teacher prep – Cut out squares of different colored construction paper. Place multiple squares at each table or center. Have scissors, glue/tape and additional materials ready also.
3. Instruct students to fold the tinfoil into a rectangle.
4. Students can then cut out multiple shapes and glue them onto the rocket.
5. Once their shapes are glued on, they must cut out the tip of the rocket (triangle) and a base or flames (rectangles).
6. Once the project is complete, have the students write their name on the backside of the rocket.
7. Optional – Take a picture of each student’s face, cut them out and glue them to the ‘window’ on the rocket ship so it appears that the student is the astronaut in their own space ship. This makes the rocket ship more personal to each individual student.
8. Display the rockets in the classroom on a bulletin board or on a ‘landing pad’ previously created. Make sure the rockets are completely dried before hanging up.
Bibliographic Data: This project was self-created but it was inspired by multiple rocket ship crafts from Pinterest.
"Pinterest." Pinterest. N.p., n.d. Web. 17 Nov. 2014.
 RSS Feed